Saturday, October 24, 2015

Configure IPTABLES with Squid

Configure IPTABLES with Squid

This is what we are going to do:
1. Install and Configure Squid
2. Run IPTABLES to allow Clients to use Squid
3. Configure proxy on client browser and access to INTERNET
4. Install SARG (Squid Report)

This is our network diagram:


1. Install and Configure Squid
yum -y install squid
# Backup an orginal config file
cp /etc/squid/squid.conf /etc/squid/squid.conf.orig
# Edit Sqid
vi /etc/squid/squid.conf
With content
acl lan5 src 5.5.5.0/24
....
http_access allow lan5
....
http_port 3128
....
visible_hostname fwprx.vannakk.org

# Start Squid and Enable to startup
service squid start
chkconfig squid on

2. Run IPTABLES to allow Clients to use Squid
Here is our script:
#!/bin/sh
WAN="eth1"
LAN="eth2"
SQUID_SERVER="5.5.5.200"
SQUID_PORT="3128"
# ----- Enable Route ----- #
echo 1 > /proc/sys/net/ipv4/ip_forward
# ----- Default to drop packets ----- #
iptables -F
iptables -X
iptables -t nat -F
iptables -t nat -X
iptables -t mangle -F
iptables -t mangle -X
# ----- Setting default filter policy ----- #
iptables -P INPUT DROP
iptables -P OUTPUT ACCEPT
# ----- Allow all local loopback traffic ----- #
iptables -A INPUT -i lo -j ACCEPT
iptables -A OUTPUT -o lo -j ACCEPT
# ----- Unlimited access to LAN ----- #
iptables -A INPUT -i $LAN -j ACCEPT
iptables -A OUTPUT -o $LAN -j ACCEPT
# ----- Allow UDP, DNS and Passive FTP ----- #
iptables -A INPUT -i $WAN -m state --state ESTABLISHED,RELATED -j ACCEPT
# ----- DNAT port 80 request comming from LAN systems to squid 3128 ----- #
iptables -t nat -A PREROUTING -i $LAN -p tcp --dport 80 -j DNAT --to $SQUID_SERVER:$SQUID_PORT
# ----- If it is same system ----- #
iptables -t nat -A PREROUTING -i $WAN -p tcp --dport 80 -j REDIRECT --to-port $SQUID_PORT
# ----- Set this system as a router of LAN ----- #
iptables -A FORWARD -i $LAN -j ACCEPT
iptables -t nat -A POSTROUTING -o $WAN -j MASQUERADE
# ----- DROP everything and Log it ----- #
iptables -A INPUT -j LOG
iptables -A INPUT -j DROP

# ----- EOF ----- #

Check client access:
tailf /var/log/squid/access.log

3. Configure proxy on client browser and access to INTERNET
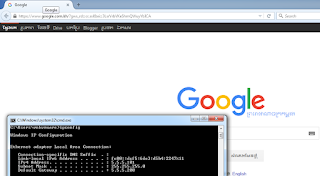
Putty Proxy on browser:
Access to Internet

4. Install SARG (Squid Report)

4.1 Install dependencies packages
yum install –y gcc gd gd-devel make perl-GD wget httpd
4.2 Download , Extract and install
wget http://nchc.dl.sourceforge.net/project/sarg/sarg/sarg-2.3.7/sarg-2.3.7.tar.gz
tar -xvf sarg-2.3.7.tar.gz
cd sarg-2.3.7
./configure
make
make install
4.3 Configure SARG
cp /usr/local/etc/sarg.conf /usr/local/etc/sarg.conf.orig
vi /usr/local/etc/sarg.conf 
Now Uncomment and add the original path to your squid access log file.
access_log /var/log/squid/access.log

output_dir /var/www/html/squid-reports

date_format e

overwrite_report yes
Save file.

Create folder squid-reports
mkdir /var/www/html/squid-reports
Generating Sarg Report
sarg -x

Start Apache
service httpd start

From Client Access to SARG by:


What we are gonna do more:


+ Block website
+ Authentication
+ Block Download extension (.exe,.mp3,.mp4...)
+ Limit Bandwidth
+ Schedule Block (facebook.com,youtube.com, ... ) during working hours
+ Block a IP range (5.5.5.100 - 5.5.5.170) but allow IP 5.5.5.150 
+ ...


IPTABLES Allow LAN to WAN

IPTABLES Allow LAN to WAN

iptables is a command line utility for configuring Linux kernel firewall implemented within the Netfilter project.

We configure on Linux Server (iptables) to allow network 5.5.5.0/24 go to INTERNET. 

Here is our script:

#!/bin/sh
WAN="eth1"
LAN="eth2"
# ----- Enable Route ----- #
echo 1 > /proc/sys/net/ipv4/ip_forward
# ----- Default to drop packets ----- #
iptables -F
iptables -t nat -F
iptables -t mangle -F
iptables -X
iptables -P INPUT DROP
iptables -P OUTPUT DROP
iptables -P FORWARD DROP
# ----- Allow all local loopback traffic ----- #
iptables -A INPUT -i lo -j ACCEPT
iptables -A OUTPUT -o lo -j ACCEPT
# ----- Allow LAN SSH TO FIREWALL PORT 22 ----- #
iptables -A INPUT -i $LAN -p tcp --dport 22 -j ACCEPT
iptables -A OUTPUT -o $LAN -p tcp --sport 22 -j ACCEPT
# ---- Allow LAN Ping TO FIREWALL ----- #
iptables -A INPUT -i $LAN -p icmp  -j ACCEPT
iptables -A OUTPUT -o $LAN -p icmp -j ACCEPT
# ----- Allow LAN access Internet ----- #
iptables -A FORWARD -o $LAN -m state --state ESTABLISHED,RELATED -j ACCEPT
# ----- NAT and MASQUERADE -----#
iptables -A FORWARD -i $LAN -o $WAN -j ACCEPT
iptables -t nat -A POSTROUTING -o $WAN -j MASQUERADE

# ----- EOF ----- #

Check on the client ip and test to INTERNET.

Finished,

#LINUX #IPTABLES #vannakk


Sunday, October 18, 2015

Install Web Services - Apache

Install Web Services - Apache


Server OS: CentOS 6.5 64bits

Install Web Services - Apache
yum install httpd

Create a VirtualHost
Create a VirtualHost point to website in /var/www/html/linux.com
mkdir /var/www/html/linux.com
vi /var/www/html/linux.com/index.html
With content

Welcome to LINUX Class.

Create a VirtualHost file name linux.com.conf in: /etc/httpd/conf.d/
vi /etc/httpd/conf.d/linux.com.conf
With content:
<VirtualHost *:80>
      ServerAdmin ken.vannakk@gmail.com
      DocumentRoot /var/www/html/linux.com
      ServerName linux.com
      ServerAlias www.linux.com
      ServerAlias linux.org
      ServerAlias www.linux.org
      ErrorLog /var/log/httpd/linux.com.error_log
      CustomLog /var/log/httpd/linux.com-access_log common
</VirtualHost>

Add Server Name at the end of file in httpd.conf
vi /etc/httpd/conf/httpd.conf
With content
ServerName      127.0.0.1

Start Apache
/etc/init.d/httpd start

Allow port 80 in iptables
vi /etc/sysconfig/iptables
Add this line:
-A INPUT -m state --state NEW -m tcp -p tcp --dport 80 -j ACCEPT
Reload iptables
/etc/init.d/iptables reload
Access to website:

Authentication with Apache
Crate Apache user name: userlinux
htpasswd -c /var/www/html/userpass userlinux
Enter password,

Update VirtualHost
vi /etc/httpd/conf.d/linux.com.conf
<VirtualHost *:80>
      ServerAdmin ken.vannakk@gmail.com
      DocumentRoot /var/www/html/linux.com
      ServerName linux.com
      ServerAlias www.linux.com
      ServerAlias linux.org
      ServerAlias www.linux.org
     <Location />
         Deny from all
         AuthUserFile /var/www/html/userpass
         AuthName "Welcome to LINUX Class"
         AuthType Basic
         Satisfy Any
         require valid-user
    </Location>

   ErrorLog /var/log/httpd/linux.com.error_log
   CustomLog /var/log/httpd/linux.com-access_log common
</VirtualHost>

Reload Apache
/etc/init.d/httpd reload

Access to that site again:

Login with the username and password we create 

Finished,

#CentOS  #Apache  #Vannakk